Javascript is a Simple but very powerful programming language which was built with the evolution of technology. Javascript is used to build web pages, process data and as well as to create various applications. (mobile apps, desktop apps, games etc.)
- basic syntax
- variables and operators
- How to build a simple calculator
.
Basic Syntax
Javascript's basic syntax is very easy. Technology has driven hard programming languages into easy and simple languages. If you can understand the fundamentals you can keep learning this easily. It starts with the <script> tag and ends with the </script> tag. All the codes go inside these tags.
Adding javascript to HTML pages is very easy. There are two different ways you could do that.
01)Within the head tags
Adding JS within the head tags is easy. What you have to do is simply opening the script tags within the <head></head> tags. Add your code there and the code will execute.
<script lanuage="javascript" type="text/javscript"> </script>
is the correct way of adding JS inside the head tags.
02)External Javascript
Adding the JS code inside the head tags is easy. But when you get familiar with Javascript and you type so many code lines, it will be so difficult to find the code lines and fix errors. In this case, you can use external javascript.
write your JS code in a text editor and save the file in .js extension
Simply add this code line in head tags.
<script src="filename.js"></script>
NOTE: you have to include the path to the .js file if it is located in another folder.
TIP: Use various .js files for various functions. This will make it easy to fix bugs and rebuild codes.
Writing in the HTML document
<script>
document.write("Hello world");
</script>
The output of the code
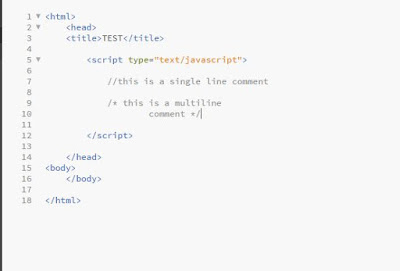
As in every other programming language, you can add comments in Javascript.
For a single line comment, you can use ' // 'at the beginning of the line.
//This is a single line comment
For a multiline comment use ' /* ' at the beginning of the comment and ' */ ' at the end of the line.
/* This is a multiline comment */
You can add comments in anywhere you want and JS skips reading comments when executed.
variables and operators
Variables and Operators are used to do different kind of arithmetic solutions and to do changes in HTML document.
Variables can be simply explained as memory packets. When you assign something as a variable, it is stored in the RAM. Assigning values to variables is easy.
var name = John;
This code simply stores a variable called name and assigns it value as John.
var name = John;
var age = 25;
var height = 125.6;
var married = true;
All of these are variables and there are different kind of values which can be assigned. String, Boolean, and integers are some of them. You can assign a name or a sentence as a string. A boolean value can be only assigned as true or false.
The most valuable thing in Javascript is it automatically understands the data type and assigns it. If you assign a name it stores it as a string and if you assign a number, it stores it as an integer.
var string = "Hello! Welcome!";
document.write(string);
The output of the code
This code will print 'Hello! Welcome!' into the HTML page.
NOTE: Javascript is a case-sensitive language which means String and string are two different variables.
Operators
There are some operators which are used to do match calculations in Javascript.
Math operators
+ Addition
- Substraction
* Multiplication
/ Division
++ Imcrement
-- Decrement
Assignment Operators
operator Example Equal to
= x=y x=y
+= x+=y x=x+y
-= x-=y x=x-y
/= x/=y x=x/y
*= x*=y x=x*y
Comparison Operators
Operator Description
== equal to
!= not equal
> greater than
=> greater than or equal to
< less than
=< less than or equal to
Building a simple calculator using these operators and variables is easy. You can simply do this by using variables, math operators, assignment operators, and document.write command.
<script>
//Addition
var a = 1;
var b = 2;
//enter the numbers you want.
var sum = a + b;
document.write(sum);
//multiplication
var c = 1;
var b = 2;
//enter the numbers you want.
var sum1 = c * b;
document.write(sum1);
//substraction
var e = 1;
var f = 2;
//enter the numbers you want.
var sum2 = e - f;
document.write(sum2);
</script>
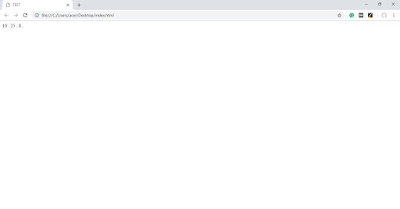
The output of the code
HINT: you can use the + symbol with double qoutes to add text with the document.write commands
example: document.write(sum + " ,");
//if the sum = 20 this code outputs 20 ,
As this, you can build a simple calculator using these codes.
HINT: Try using alert command instead of document.write. This will give the output as an alert window.
example: sum = 20;
alert(sum);
Hope this guide could help you in understanding the basics of Javascript. Leave a suggestion or a comment to add or improve the user experience.
Popular Articles
How to speed up computer
Extend mobiles battery life


This comment has been removed by a blog administrator.
ReplyDeleteNew version Tech Solitic
ReplyDeleteAmazing post and this information is very useful for me. I like this post. I really enjoyed reading your post. Thank you so much for sharing this post. Visit To Know More: Rajendra Geda
ReplyDelete